
Here are the photos I saw, just so you guys can see first:

Those are the only two I came across with the leggings.
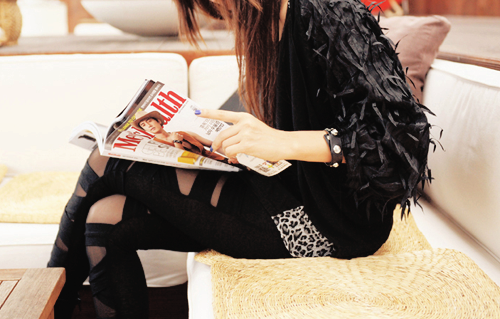
And here are mine...

Maybe I should have worn black tights underneath... but too hot.
If any of you want to make them too, here is how I did it:
Step one
Purchase some cheap leggings. I bought mine from Primark for £3! As leggings all look the same anyway, so you might as well save money and be efficient.
Step two
Turn the leggings INSIDE OUT This step is very important.
I then wore them inside out in order to mark off where the first strip should begin. Putting it simply, just imagine that you are going to turn these leggings into a pair of shorts.
I used tailor chalk to mark it off. Make sure you ONLY mark the front!

Note: The photo shows one leg, do the same steps on both.
Step three
Once you've marked the front, you are ready to cut!
Make sure that you cut the front of the leggings only! Be careful not to cut the back as well.
Cut along the side of the legs, and across where you have marked off. Photo below shows where to cut:

Step four
Cut the front into strips like so (I did 11 strips. Depending on your height you may do more or less. For reference, I am 5"2 and half)
Note: The size of strips does not have to be exact, infact varying strip size would be better.


Step five
Arrange the strips into criss-crosses however you want them. Be adventurous and place the strips far apart and in a messy way if you want. It doesn't have to be neat or have a pattern, but depending on your personal preference, do what you like. I personally done mine in a neat way (as it was my first attempt I played it safe).

Line up the edge of the strip to the edge of the back of the leggings and tack it down in place. Make sure you use a light colour thread so that you can see where it is and it makes it easier to take out at the end. The tacking does not need to be neat, it is just a way to keep it in place so it doesn't move when you sew the two pieces together.
Once you get to the end of the leg, you may find that the last strip will not line up properly. Simply cut off the excess material until it is able to line up, as shown below:

Step six
Now that everything is in place, the next step is to sew it together.
Using a sewing machine, do a straight stitch all the way up the side of the leg where you have tacked the strips to the side together.

Finish!
Get an unpicker and take out the tacking that you have done (white stitches).
Turn the leggings the right way around, and you're done!
Ready to wear :)
It should like something like this

Hopefully these steps are easy to follow... If people want a video tutorial i'll be happy to make one ^^~
They look fab! Saw some on someone else's tumblr..
ReplyDeletehttp://26.media.tumblr.com/tumblr_lnhw6qYTLZ1qbfgtro1_400.jpg
x
Those ones are nice!!
ReplyDelete